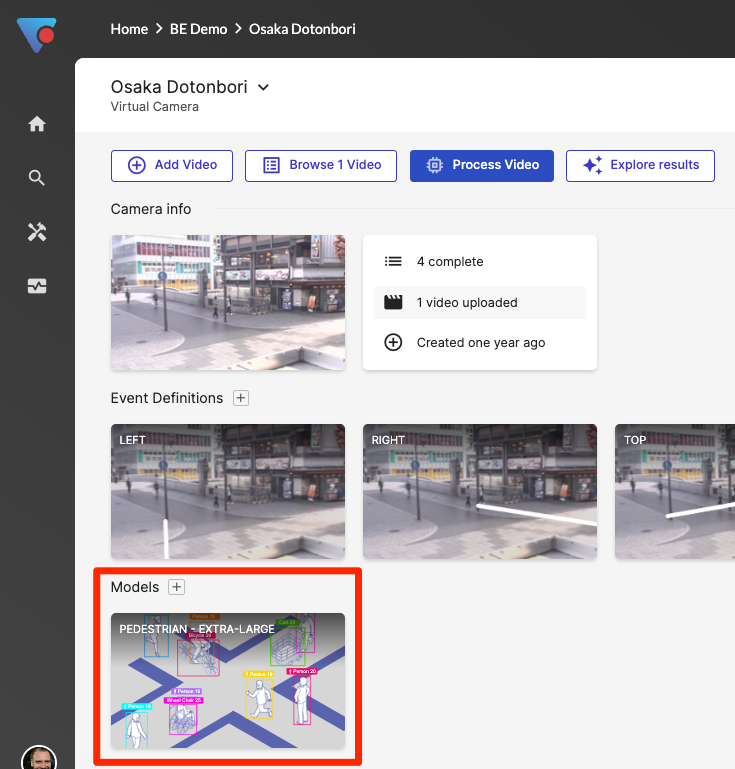
Models
At a high level, VisualCortex allows you to configure, run and monitor Computer Vision Models.
Computer vision models can come from a variety of sources. These include:
- Models part of VisualCortex
- Extra models created by VisualCortex
- Models developed by VisualCortex Partners
- Private models developed users of VisualCortex

Above: A sample visualisation of VisualCortex's Pedestrian model, which comes with VisualCortex.
Computer vision models take in video feeds and produce metadata. This metadata can then be used for realtime operations (integrations, alerts etc.), or for reporting.
Applying models to video
Generally speaking, adding a Computer Vision model to a Virtual Camera or a Live Camera works the same way. Some models are applicable only to Live sources, while others are applicable only to Virtual sources, but generally speaking the same models work with both.
In the Camera overview, you'll be able to see the models which are currently running (or set to run) for that camera - whether or not it's live or virtual. To add a model, simply click the [+] icon next to models in the Camera overview section.
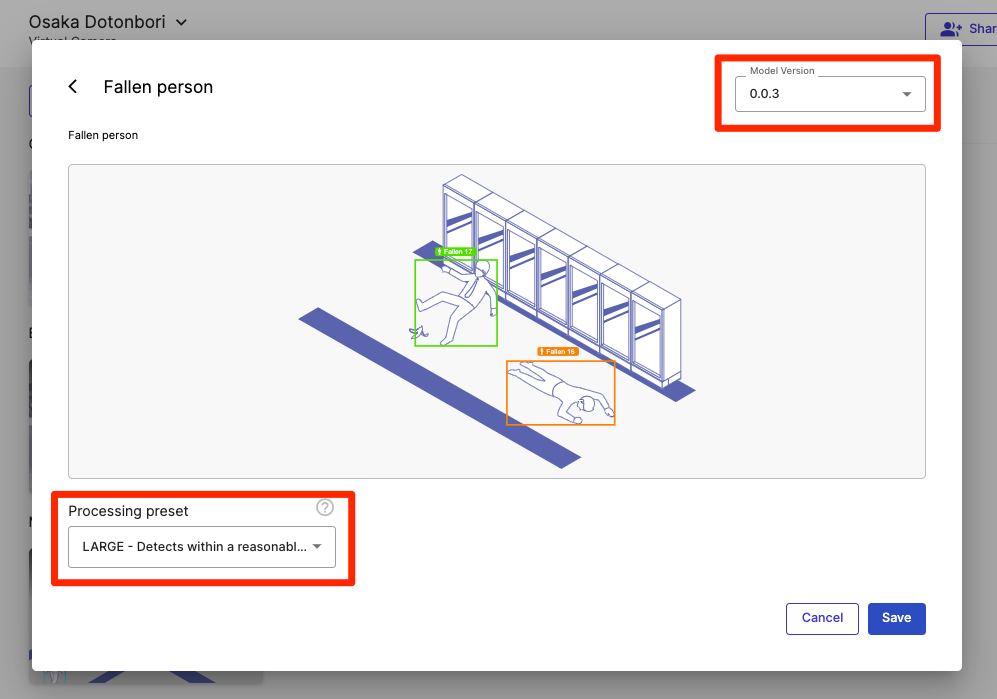
Different models have different settings. Some may require you to define a zone, provide metadata, confidence levels etc. Others have no settings - it depends on the requirements of the model selected.
Every model also has a Version, which is available in the top right-hand side of the model definition dialog, as well as Processing Preset. Processing presets allow you to select the right optimisation of the model for your given camera. Generally speaking, this affects internal settings that the model author has defined; This typically involves settings such as frames per second and model resolution.
Once a model has been added to a camera, it's either available for processing (if the camera is a Virtual Camera), or immediately applied if it's a Live Camera.
Processing on Virtual Cameras
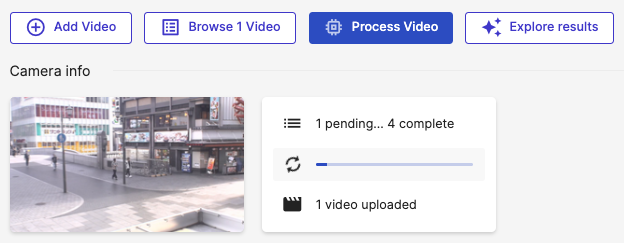
Once a computer vision model is applied to a Virtual Camera, you can elect to Process the footage associated with that camera. Simply click Process in the Virtual Camera overview screen, and walk through the wizard.
You'll first be prompted to choose the footage you want to process.

Next, you'll be asked which models you want to process on this footage. Each model takes a certain amount of Credits per second.
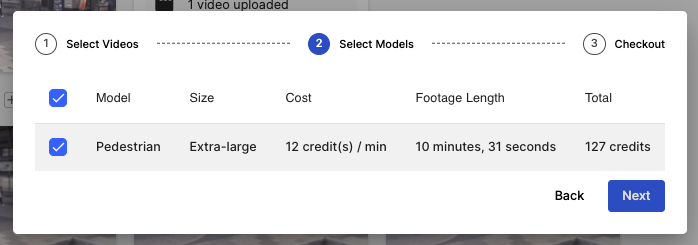
Once you've confirmed your selection, VisualCortex will schedule the processing on the Edge Cluster associated with your Virtual Camera. You'll be presented with a progress bar, and notified via email once the processing has been completed.
Once complete, you'll be able to view data in Dashboards and Visualise small portions of your video.
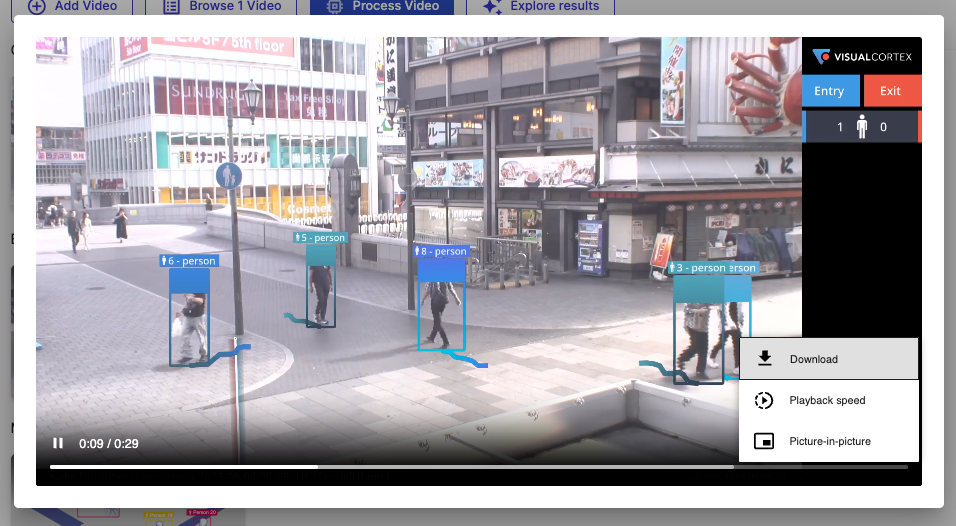
Visualising video
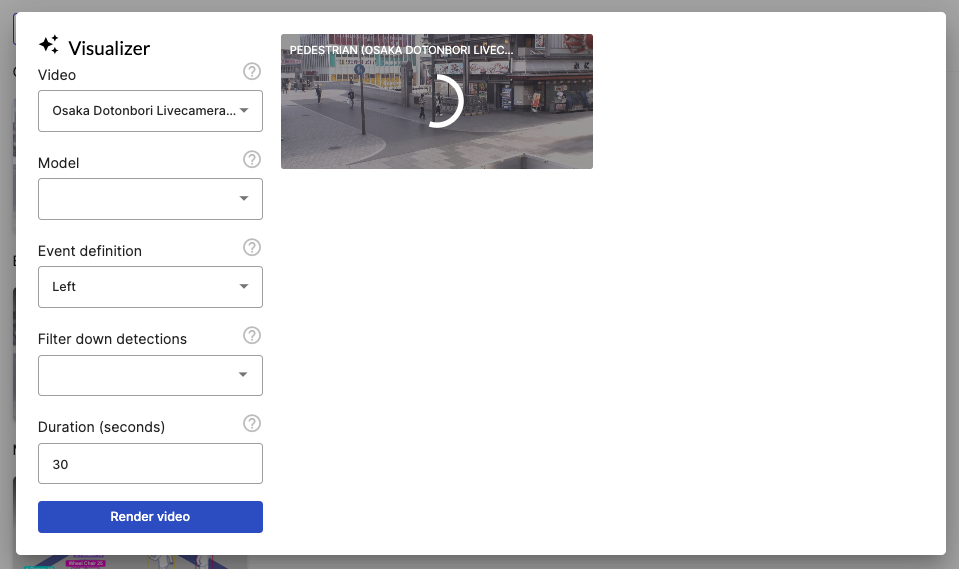
Sometimes it's helpful to visualise the metadata coming out of a computer vision model. This is particularly useful if you're trying to understand how well the model is performing or whether or not the preset is appropriate for the video.
VisualCortex allows you to visualise small segments of Virtual Camera Footage. In order to do this, you'll need to have:
- Footage added to the Virtual Camera
- Processed the footage through a Computer Vision Model
- Added in at least one Event Definition
To create a visualisation, simply press the Explore Results button. You'll then be asked to choose a Model, Event Definition and a duration from 1-600 seconds. Once you've selected what you need, press Render Video. The video render job will be scheduled on the Virtual Camera's Edge Cluster and you'll see the progress in the main window.
Once visualisation is complete, you can click on the thumbnail to view the appropriate video. Visualisation videos persist for only 5 minutes. If you want to save the video for later, simply choose the option in the video player to download.